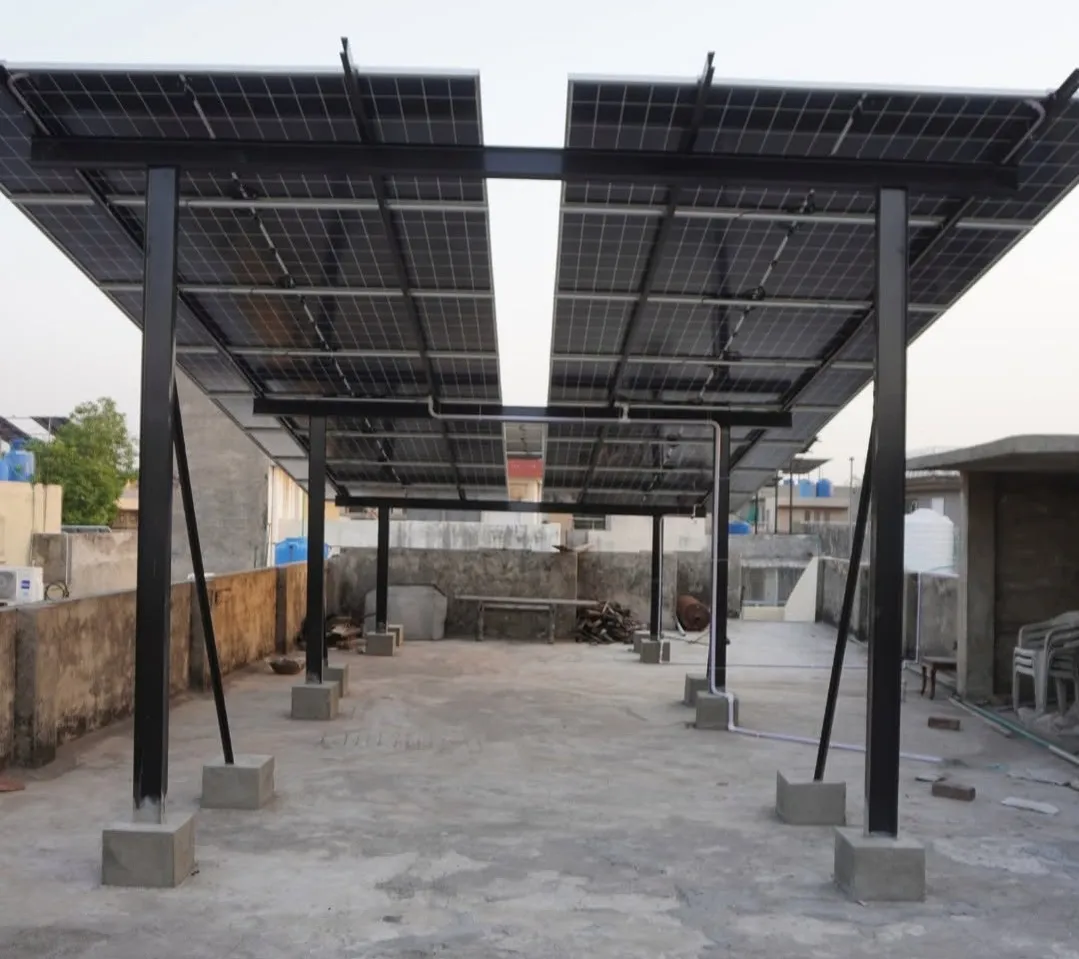
This is a 10 kW grid-hybrid system: solar and battery carry the home, the inverter tops the battery from panels or grid as needed, and it falls back to the grid when it has to. It was built to cut the bill and to hold the house up through Lahore's load-shedding. The two things we want to point out are not the headline kilowatts. They are the mounting and the board, because those are where a good install quietly separates itself from a cheap one.
The system at a glance
- Size: 10 kW hybrid solar system
- Array: mono panels on a raised steel structure
- Inverter: 10 kW hybrid inverter with dual PV (MPPT) inputs, battery, and grid connections
- Distribution: a changeover board separating solar and grid (WAPDA) circuits, with surge protection
- Location: Sabzazar, Lahore
Why the array is raised on a steel frame
Most rooftop arrays sit on short legs, a foot or so above the slab. This one is up on a tall steel structure that a person can walk under. That is more steel and more cost, so it is a deliberate choice, and in a climate like Lahore's it earns its keep for three reasons.
- Cooler panels. Solar panels lose output as they heat up. Raising them off a hot concrete roof and leaving a big air gap lets air move across the back, which drops the cell temperature and lifts the yield during the hottest part of the day, exactly when the roof slab is radiating heat.
- The roof stays usable. The shaded floor under the frame is still a working rooftop. On a city home where the roof is used, that space is not written off.
- Better tilt and airflow. A proper frame sets the panels at a useful angle for the latitude and keeps them clear of standing water and roof debris.
The trade-off is wind load. A raised structure catches more wind, so the steel, the bracing, and the concrete footings have to be sized for it. You can see the footings in the photo, each leg landed on its own cast block. That is the part you cannot skimp on.
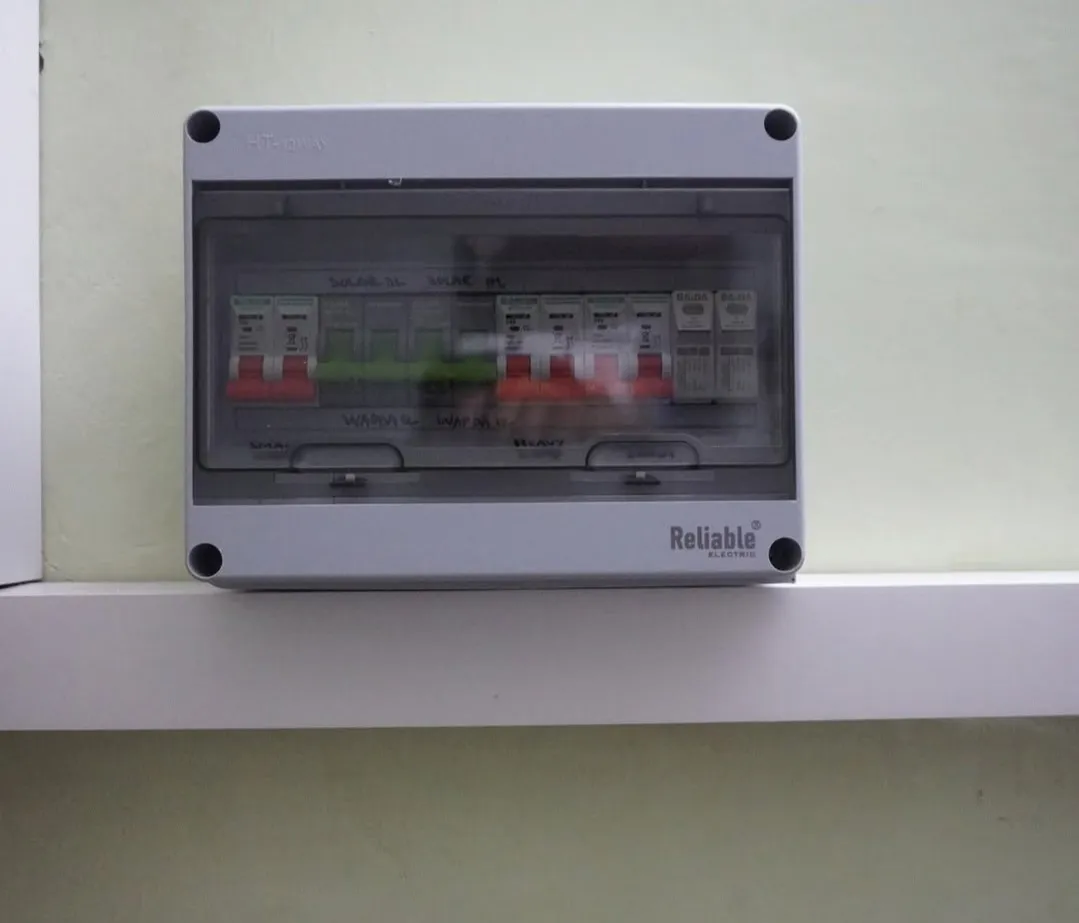
The changeover board: solar and grid kept apart
This board is the detail we would point any homeowner to. Look at the labels written above and below the breakers: one bank is marked for the solar supply, the other for the WAPDA grid supply, split into the small and the heavy loads. The two sources feed the house through their own breakers, not spliced together behind the wall.
Keeping the solar and grid supplies on clearly separated, clearly labelled breakers is exactly the discipline that stops the dangerous shortcut we warn about everywhere on this site: never tie an inverter into house wiring in a way that can push power back onto the grid. A board like this, with defined changeover, is how you get backup without creating a backfeed hazard for a lineman working the street.
On the right of the board are two surge protection devices (SPDs). Those clamp the voltage spikes that ride in on the grid and, in this region, on nearby lightning. They are cheap insurance for an expensive inverter, and most budget installs leave them out. For the wider reasoning on isolation, fusing, and protection, see the safety section of our inverter sizing guide.
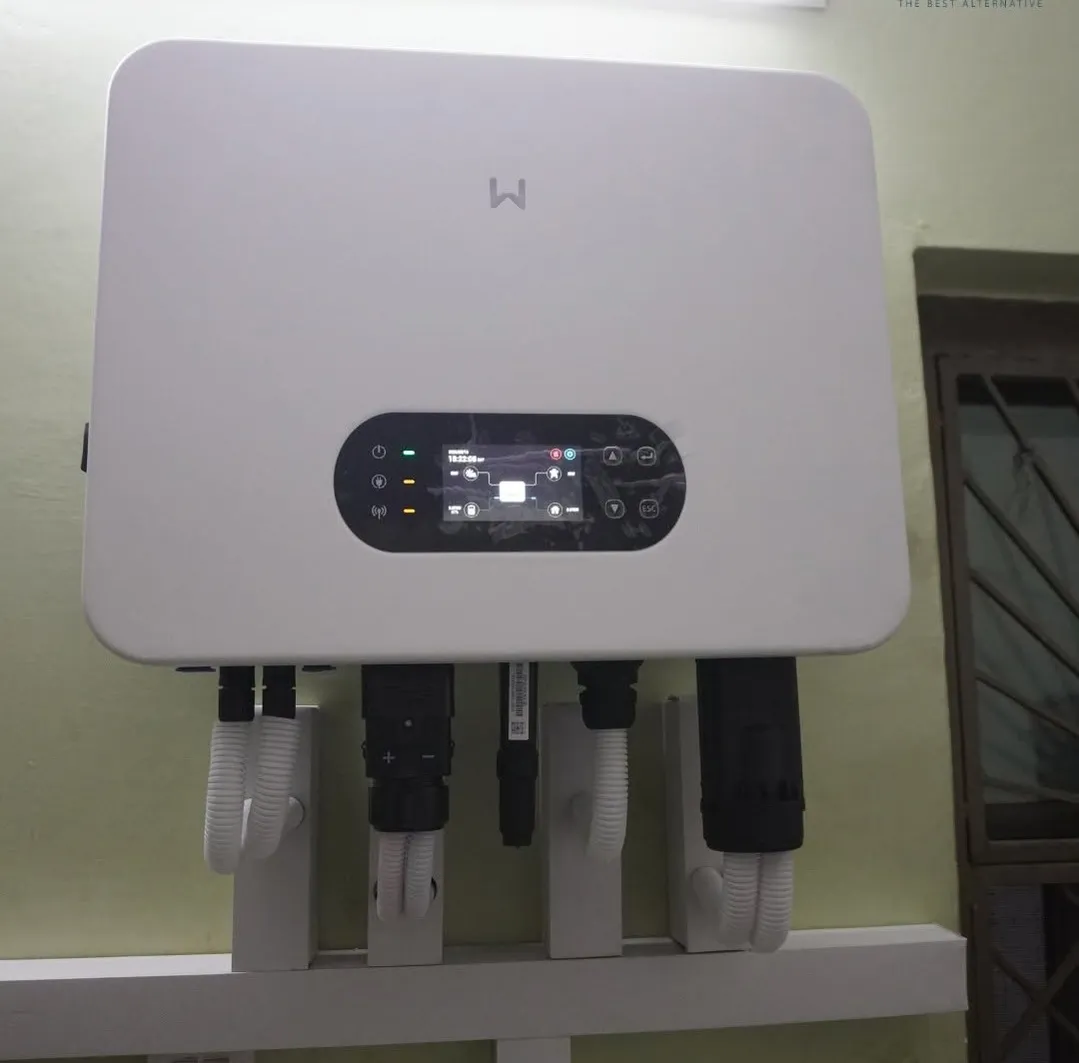
The hybrid inverter
The inverter is a 10 kW hybrid unit with a colour power-flow display that shows, at a glance, where the energy is moving: panels to house, house to grid, or battery in and out. Underneath, the conduit carries the separate runs it needs as a hybrid: two PV (MPPT) inputs for the solar strings, a battery connection, and the grid and load connections. Splitting the array across two MPPT inputs lets two panel groups at slightly different angles or shading each track their own best operating point instead of dragging each other down.
What we would add to these notes
Being straight about a photo write-up: there are specifics we will fill in as we confirm them, rather than guess at them here.
- The exact panel model and count, and the inverter and battery make and capacity.
- The battery's usable kWh and the backup time it holds under the home's evening load.
- A month of generation data, to state a real daily average instead of a nameplate figure.
If you are planning something similar, start by working out your own numbers: turn your appliances into a daily energy figure with the appliance wattage calculator, then size panels and a battery around it using our solar sizing guide.
